Spring Boot 介绍
Spring Boot 是由 Pivotal 团队提供的全新框架,其设计目的是用来简化新 Spring 应用的初始搭建以及开发过程。该框架使用了特定的方式来进行配置,从而使开发人员不再需要定义样板化的配置。通过这种方式,Spring Boot 致力于在蓬勃发展的快速应用开发领域(rapid application development)成为领导者。
Spring Boot 特点 简单、快速、方便
1.创建独立的 Spring 应用程序
快速入门 创建 Spring Boot 有两个方式,通过访问 http://start.spring.io 获取 Spring Boot 基础项目,
1.访问 http://start.spring.io
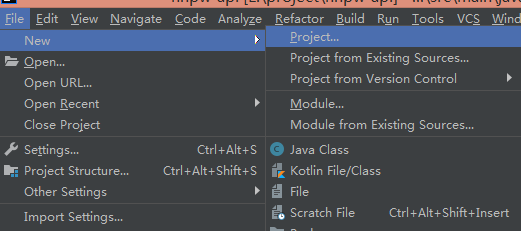
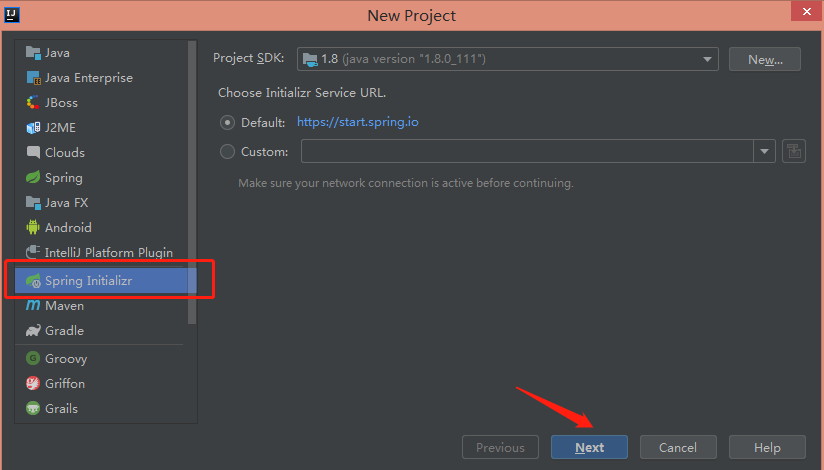
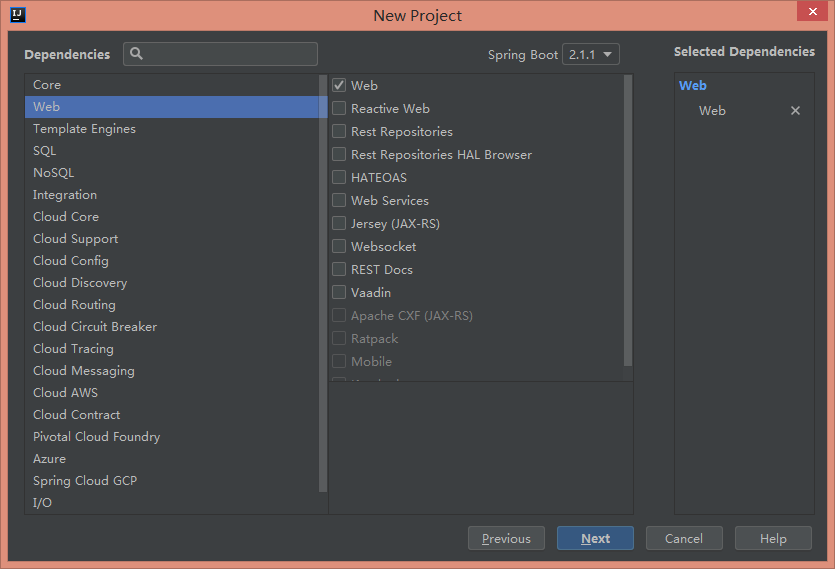
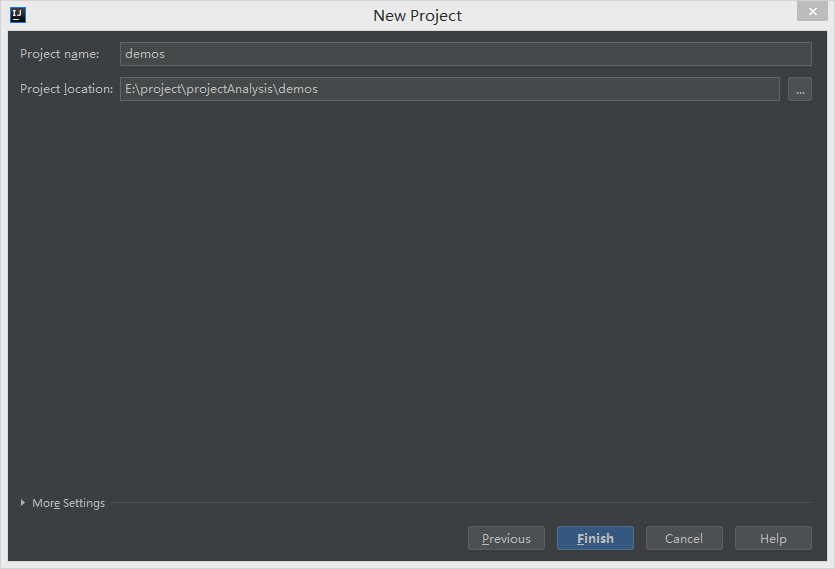
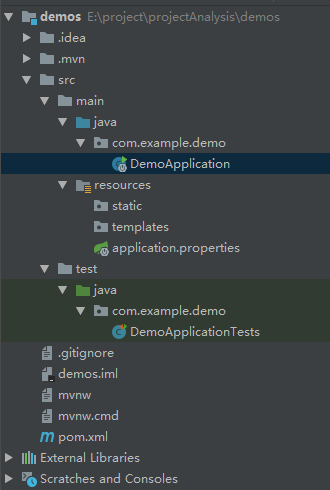
通过 IDE 创建 Spring Boot 项目(以 idea 为例) 打开idea,File -> New -> Project -> 选择 Spring Initializr -> Next -> 设置包名项目名构建工具 Next -> 添加依赖 Next -> Finish
src/main/java 程序开发以及主程序入口
src/main/resources 配置文件
src/test/java 测试程序
至此,Spring Boot 项目创建成功。
创建一个简单的 Web 应用程序 在 pom.xml 文件中添加 web 依赖包 1 2 3 4 <dependency > <groupId > org.springframework.boot</groupId > <artifactId > spring-boot-starter-web</artifactId > </dependency >
创建 Web 控制器 1 2 3 4 5 6 7 8 9 10 11 12 13 14 package com .example .demo ;import org .springframework .web .bind .annotation .RestController ;import org .springframework .web .bind .annotation .RequestMapping ;@RestController public class HelloController { @RequestMapping ("/") public String index() { return "Greetings from Spring Boot !"; } }
@RestController 让 Spring MVC 可以使用它来处理Web请求
在 Application 类中调用 controller 1 2 3 4 5 6 7 8 9 10 11 12 13 14 15 16 17 18 19 20 21 22 23 24 25 26 27 28 29 30 31 package com.example.demo; import org.springframework.boot.CommandLineRunner;import org.springframework.boot.SpringApplication;import org.springframework.boot.autoconfigure.SpringBootApplication;import org.springframework.context.ApplicationContext;import org.springframework.context.annotation.Bean;import java.util.Arrays;@SpringBootApplication public class DemoApplication public static void main(String [] args) { SpringApplication .run(DemoApplication .class , args); } @Bean public CommandLineRunner commandLineRunner(ApplicationContext ctx) { return args -> { System .out.println ("Let's inspect the beans provided by Spring Boot:" ); String [] beanNames = ctx.getBeanDefinitionNames(); Arrays .sort (beanNames); for (String beanName : beanNames) { System .out.println (beanName); } }; } }
@SpringBootApplication 是一个便利注解,包含了以下所有内容:
运行项目 控制台输出由 Spring Boot 提供的引导包 访问http://localhost:8080/调用控制器 页面显示: Greetings from Spring Boot!
单元测试 添加依赖 1 2 3 4 5 <dependency > <groupId > org.springframework.boot</groupId > <artifactId > spring-boot-starter-test</artifactId > <scope > test</scope > </dependency >
编写一个简单的单元测试,通过端点模拟 servlet 请求和响应 1 2 3 4 5 6 7 8 9 10 11 12 13 14 15 16 17 18 19 20 package com .example .demo ;import org .junit .Test ;import org .junit .runner .RunWith ;import org .springframework .beans .factory .annotation .Autowired ;import org .springframework .boot .test .context .SpringBootTest ;import org .springframework .test .context .junit4 .SpringRunner ;@RunWith (SpringRunner .class ) @SpringBootTest public class DemoApplicationTests { @Autowired private HelloController helloController; @Test public void getHello() throws Exception { System .out .println ("\n "+helloController .index ()); } }
运行测试类,控制台成功输出即可。
学习资源 Spring Boot 官网 Spring Boot 官方入门案例

